Why Make This Recipe
Apple Cider Brined Turkey is a delightful way to enhance the flavors of your Thanksgiving or holiday feast. The brine infuses the turkey with moisture and a sweet, savory flavor that will leave your guests raving. By soaking the turkey overnight in this aromatic mixture, you’ll achieve a juicy, tender bird that’s full of character.
This simple yet effective recipe uses easily accessible ingredients, making it a go-to choice for home cooks of all skill levels. With a few straightforward steps, your turkey will be the star of the show, bringing warmth and joy to your dining table.
Equipment Needed for Apple Cider Brined Turkey
To prepare this delicious apple cider brined turkey, you’ll need a few essential pieces of kitchen equipment. Having the right tools will make the process smoother and more enjoyable.
- Large pot for boiling brine
- Roasting pan with a rack
- Brine bag or large stock pot
- Kitchen twine for tying turkey legs
- Meat thermometer to check doneness
- Cutting board and sharp knife for carving
What You Need to Make Apple Cider Brined Turkey
Gather the following ingredients to make this wonderful turkey:
- 2 qt apple cider
- 6 cups water
- 1 cup kosher salt
- 1/4 cup packed brown sugar
- 4 cinnamon sticks
- 3 sprigs fresh rosemary
- 1 orange, quartered
- 1 tsp whole cloves
- 1 tsp whole peppercorns
- 1 (8-lb) whole turkey, giblets removed
- 1 red onion, cut into large wedges
- 1 apple, quartered
- 1 head garlic, halved
- Kosher salt
- Freshly ground black pepper
- 6 Tbsp butter, melted
How to Cook Apple Cider Brined Turkey Step by Step
The night before you plan to cook your turkey, start by making the brine. In a large pot over medium heat, combine the apple cider, water, kosher salt, brown sugar, cinnamon sticks, rosemary, orange, cloves, and peppercorns. Bring the mixture to a boil and stir until the sugar and salt dissolve completely. Once dissolved, remove the pot from the heat and set it aside to cool to room temperature.
Once the brine has cooled, place your turkey in a brine bag or in a stock pot that is large enough to hold the turkey comfortably. Carefully pour the brine over the turkey, ensuring that it is covered entirely. Seal the bag or cover the pot, then refrigerate the turkey overnight. This allows the flavors to penetrate deep into the meat.
On the day of cooking, preheat your oven to 400 degrees Fahrenheit. After the turkey has brined overnight, remove it from the brine and pat it dry with paper towels. This step is crucial for achieving a perfectly crispy skin. Next, stuff the turkey cavity with the red onion, quartered apple, and halved garlic head.
Now, season the turkey generously with kosher salt and freshly ground black pepper. Brush the entire surface of the turkey with melted butter, which will help with browning and contribute to the rich flavor. Using kitchen twine, tie the legs of the turkey together to promote even cooking.
Place the turkey on a roasting rack set inside a large roasting pan. This will allow air to circulate around the bird for uniform cooking. Roast the turkey in the preheated oven until it reaches a golden-brown shade and the thickest part of the thigh registers an internal temperature of 165 degrees, which typically takes about 1 hour and 30 minutes to 2 hours.
Once done, remove the turkey from the oven and let it rest for about 15 minutes before slicing. This resting period is essential as it allows the juices to redistribute within the meat, ensuring that every slice remains juicy and flavorful.
How to Make Apple Cider Brined Turkey
Making apple cider brined turkey is all about preparation and patience. Begin by creating your brine the night before you plan to serve your meal. The longer the turkey marinates, the more flavorful and moist it will be.
Remember to gather your ingredients and equipment before you start cooking. This will make the entire process efficient and impressive. Follow the cooking steps closely to avoid any mishaps and ensure a successful outcome. Keep an eye on the turkey as it roasts, checking the temperature to make sure you don’t overcook it.
Once the turkey is perfectly cooked, let it rest. This step is crucial for the best eating experience. When ready, carve the turkey and present it beautifully on your table, showcasing the hard work you put into achieving that perfect brined bird.
How to Serve Apple Cider Brined Turkey
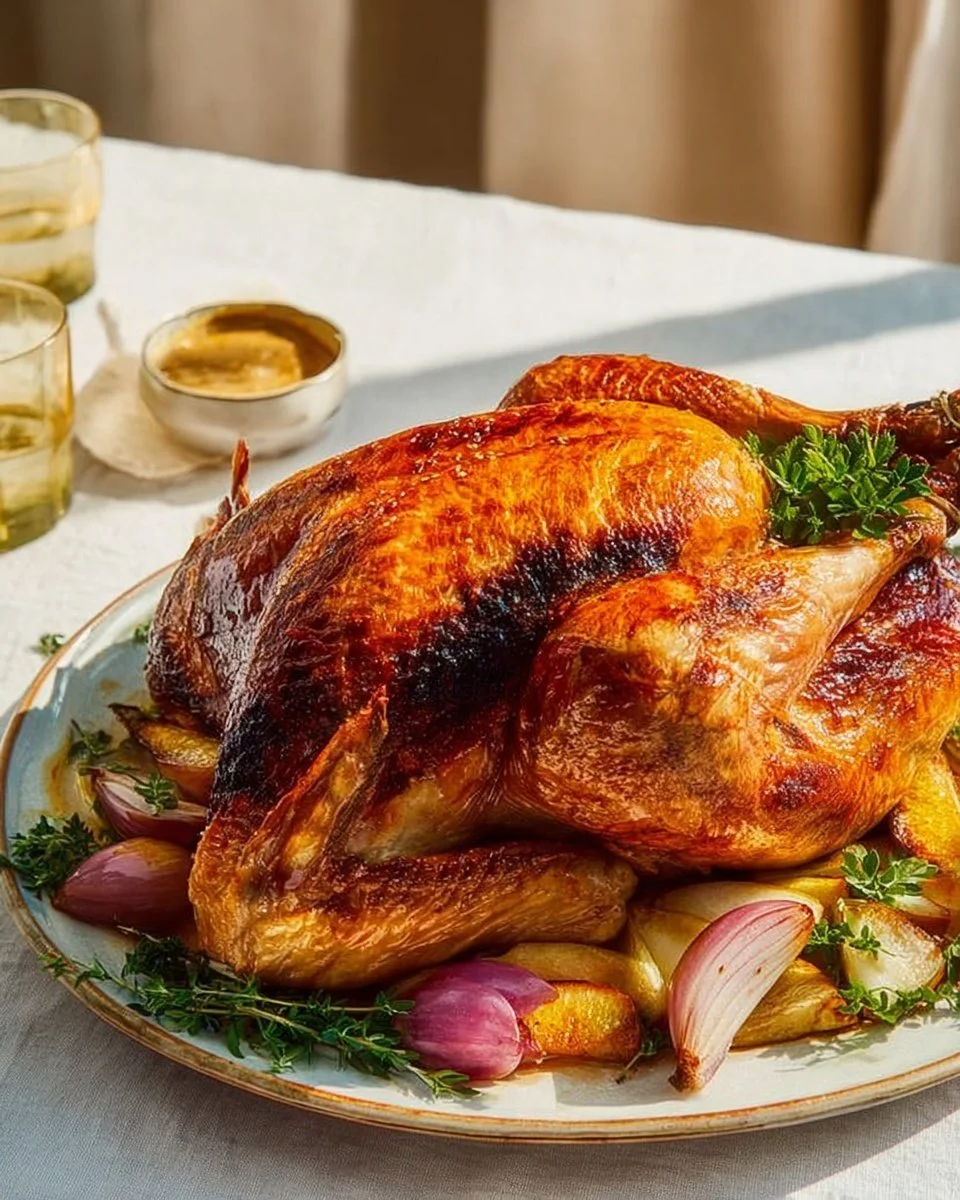
Serving apple cider brined turkey can be a delightful affair. Presenting it on a large platter garnished with fresh herbs like rosemary or thyme adds a festive touch. As you carve, let the savory aroma enhance the atmosphere.
Consider serving the turkey alongside a homemade gravy made from the drippings. This adds an extra layer of flavor that complements the juicy turkey wonderfully. Provide a range of sides that bring out the flavors of the turkey, such as cranberry sauce, sweet potatoes, and green beans.
Encourage your guests to help themselves and enjoy the meal at their leisure. The combination of flavors from the brined turkey, alongside classic sides, creates a memorable dining experience.
What to Serve with Apple Cider Brined Turkey
Apple cider brined turkey pairs brilliantly with a variety of side dishes. This offers incredible versatility, allowing you to mix and match according to your preferences or seasonal availability.
Traditional sides like mashed potatoes, green bean casserole, or stuffing work perfectly alongside the turkey. You can also opt for roasted seasonal vegetables for a fresher appeal. The sweetness of the apple cider pairs well with tart cranberry sauce, adding a bright contrast to the meal.
For drinks, a crisp white wine or sparkling cider can enhance the rich flavors of the turkey. Whatever you choose, aim for a balance of flavors to elevate the overall dining experience.
How to Store Apple Cider Brined Turkey
If you have leftovers after your meal, proper storage is essential to maintain the turkey’s flavor and texture. Allow the turkey to cool to room temperature before you begin to store it.
Once cooled, wrap the turkey tightly in plastic wrap or aluminum foil. You can also place it in an airtight container to keep it fresh. Store the wrapped turkey in the refrigerator where it can last for about 3 to 4 days.
If you anticipate not consuming the turkey right away, consider freezing it. Slice the turkey and place it in resealable freezer bags. Ensure to remove as much air as possible to prevent freezer burn. Properly stored, frozen turkey can last for up to 4 months.
Tips to Make Apple Cider Brined Turkey
To ensure you achieve the best results with your apple cider brined turkey, consider some helpful tips. Firstly, plan your timeline well in advance. Brining takes time, so allow for sufficient refrigeration overnight.
Don’t rush the brining and cooking process. The more time you let the turkey absorb the flavors of the brine, the more delicious the end result. Be sure to check the turkey’s internal temperature using a reliable meat thermometer to guarantee it’s cooked perfectly.
Lastly, allow your turkey to rest after cooking. This is crucial for giving the meat time to retain its juices, making each slice as juicy as possible.
Variation
If you’re open to variations, consider incorporating additional ingredients into your brine. Adding spices like ginger, nutmeg, or even a splash of maple syrup can bring a unique twist to the traditional flavors.
Experimenting with different herbs, such as thyme or sage, can also create exciting flavor profiles. Each variation will present new taste experiences for you and your guests, keeping mealtime fresh and engaging.
Best Time to Make Apple Cider Brined Turkey
Apple cider brined turkey shines during the holiday season, especially around Thanksgiving and Christmas. These festive occasions are perfect opportunities to bring out this delicious recipe.
However, you don’t have to wait for the holidays to enjoy it. This recipe is versatile enough for family gatherings, Sunday dinners, or any time you want to impress your friends and family with a hearty meal.
Common Mistakes to Avoid
While preparing apple cider brined turkey, a few common pitfalls can affect your final dish. One mistake is not removing the giblets from the turkey, which can create off flavors in the dish. Always check before brining.
Another common error is not allowing enough time for brining. Rushing this process can lead to a dry turkey. Ensure you plan in advance so your turkey can soak for the full recommended time.
Lastly, don’t skip the resting period after roasting. This step is critical for retaining the moisture of the meat. Cutting into the turkey too soon can cause the delicious juices to seep out, leaving you with a drier texture.
Nutritional Notes
While apple cider brined turkey is a delightful dish, it’s essential to consider its nutritional aspects. Turkey is a lean protein, making it a healthier choice compared to red meats. It’s low in fat while providing essential vitamins and minerals like B vitamins, zinc, and iron.
However, be mindful of the sodium content in the brine. If you are watching your salt intake, consider reducing the amount of kosher salt used or brining for a shorter time.
FAQs
Can I brine a frozen turkey?
Yes, you can brine a frozen turkey, but it’s essential to thaw it completely first. Plan ahead, as this can take several days in the refrigerator.
How long can I brine the turkey?
For the best results, brine your turkey overnight — about 12 to 24 hours. Avoid brining for more than 24 hours, as it can lead to overly salty meat.
Can I use a different type of sugar in the brine?
Absolutely! While brown sugar enhances flavor, you can use white sugar, honey, or maple syrup according to your preference.
Conclusion
Apple Cider Brined Turkey is a fantastic way to impress your loved ones during the holidays or any special occasion. The infusion of flavors from the apple cider and spices creates a moist and succulent bird that will leave everyone asking for seconds.
With simple preparation and a few tips, you can create a memorable meal that’s perfect for sharing. So, gather your ingredients, follow the steps, and enjoy the delicious fruits of your labor with family and friends. The joy of cooking and sharing good food is one of life’s greatest pleasures.